
You’ve decided to keep honey bees, and you’re not allergic to their stings, as far as you know. Congratulations on your new adventure into the fascinating world of our most illustrious pollinators and honey makers.
But what about your neighbours? Might your bees soiling their laundry and cars, or swimming in their pool while searching for water, annoy them? Have you had a chat to discuss their potential new neighbours? Does your insurance policy cover you for beekeeping? You do need insurance and it comes with membership of national organisations in the UK such as, The British Beekeepers’ Association (BBKA), and The Scottish Beekeepers’ Association (SBA).
Most people are aware of the need to protect bees and other pollinators, and are generally open to the idea of beekeeping, especially if they receive a jar of honey now and again.
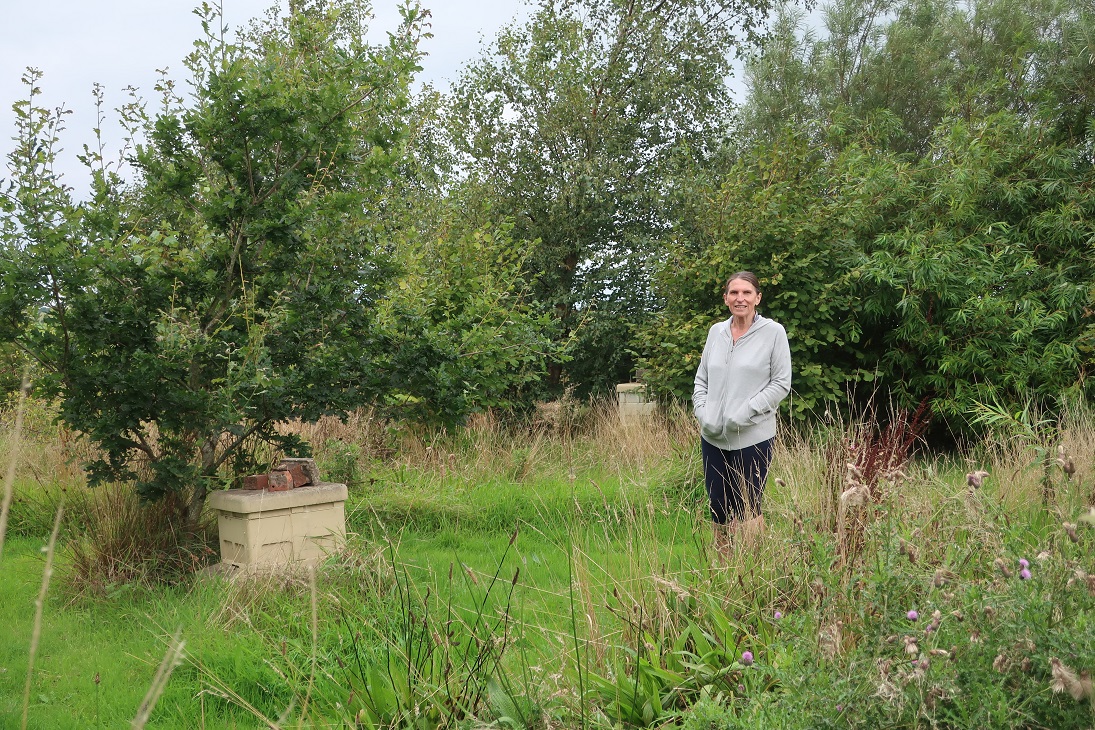
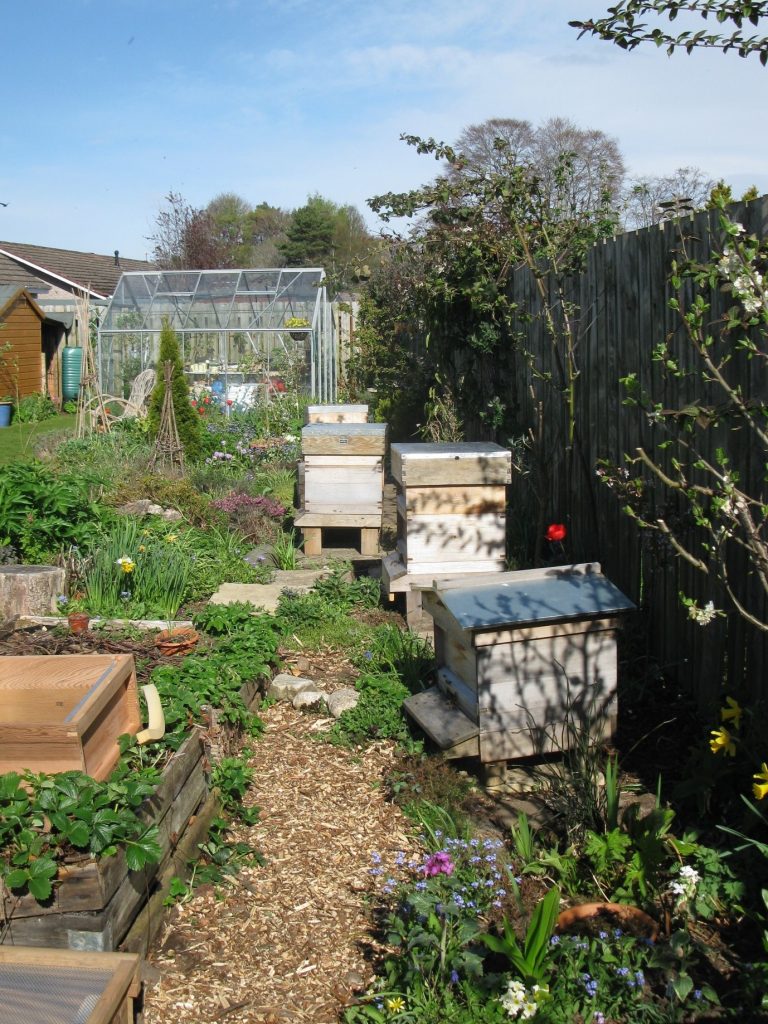
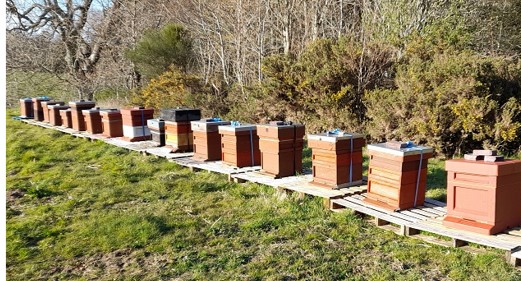
Siting The Apiary.
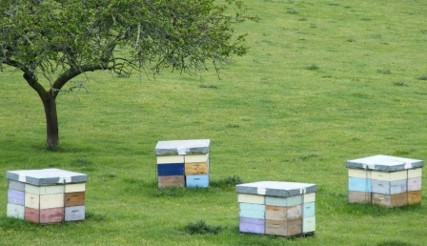
- South facing is good and the position unmanaged bees in the wild choose. Some beekeepers face their hives south east to catch the morning sun and encourage the bees out of bed earlier and off to work in a nectar flow. No northerly winds must come whistling through the entrance though, and avoid damp ground and frost pockets.
- Keep the furthest distance that you can between hives to reduce the risk of spreading infection and disease when bees inevitably drift into the wrong hives. I used to line my hives up like beds in a hospital ward—not good–now I have at least 10 feet between them when I can. Spacing hives four feet apart is better than having them closer together. If you don’t have the luxury of space then face the hive entrances at different angles.
- If you live near a road or public footpath, ensure that the bees have a tall barrier, like a hedge, between the hive entrance and the roads so that they must fly up and over to avoiding colliding with pedestrians, cyclists or horse-riders.
- I would avoid keeping bees on an allotment as a beginner because risk management is more involved. It is certainly beyond the scope of this article.
- Avoid siting hives under trees (anecdotal evidence suggest it makes for grumpy bees, and I’ve seen a beekeeper perform an entertaining version of the highland fling as bees got up his trousers legs in a heavily wooded apiary where his bees were permanently defensive). In winter, hives under trees are subject to lumps of snow crashing down on the hive roof. Disturbing water drips annoy bees. Dappled shade is ideal with a bit of shelter from hot sun if you are blessed with that where you live.
- A safe water source is essential—bees require lots of water during brood rearing to make brood food, and they can only utilise honey stores, for their own energy needs, when it is in a 50/50 solution. In hot weather, bees paint water on the combs and fan their wings to evaporate it which cools the hive during the process. Ideally site the water source where it catches the winter sun because water- collecting bees are most vulnerable when flying home with cold water in their crops on a cold day. Since brood rearing starts again around the winter solstice in the northern hemisphere, water collectors will be out working on winter days. Bees like muddy water from which they obtain minerals and salt—plants (their food sources) contain very little salt. Put structures, such as pebbles, moss, or sacking in place to reduce the risk of chilling and being unable to fly off. If they don’t have a handy water source your bees will fly to your washing line and suck water from your pristine white sheets. Even worse, they may visit your neighbour’s washing line, or swimming/paddling pool.
- Hives need air circulating round them so avoid long grass in the apiary unless you have Asian hornets to contend with and need to provide some cover for bees to hide in. Bees have evolved to be fearful of vibrations but you can use a hand scythe to very efficiently clear grass without disturbing them. Otherwise, suit up and mow.
- Try to have hives on even ground with no hidden obstacles for the beekeeper to trip over. Best if you don’t have far to carry equipment to and from storage—likewise when carrying off heavy honey supers.
- Adequate forage sources throughout the season are important because good nutrition is key to maintaining bee health. Study the area in a 3-mile radius from your apiary to assess forage and if you are unsure ask a local beekeeper for advice.
- Siting an out-apiary requires a few additional considerations such as: permission from landowner; protection from livestock/human vandals; vehicle access and shelter.
Toolkit.
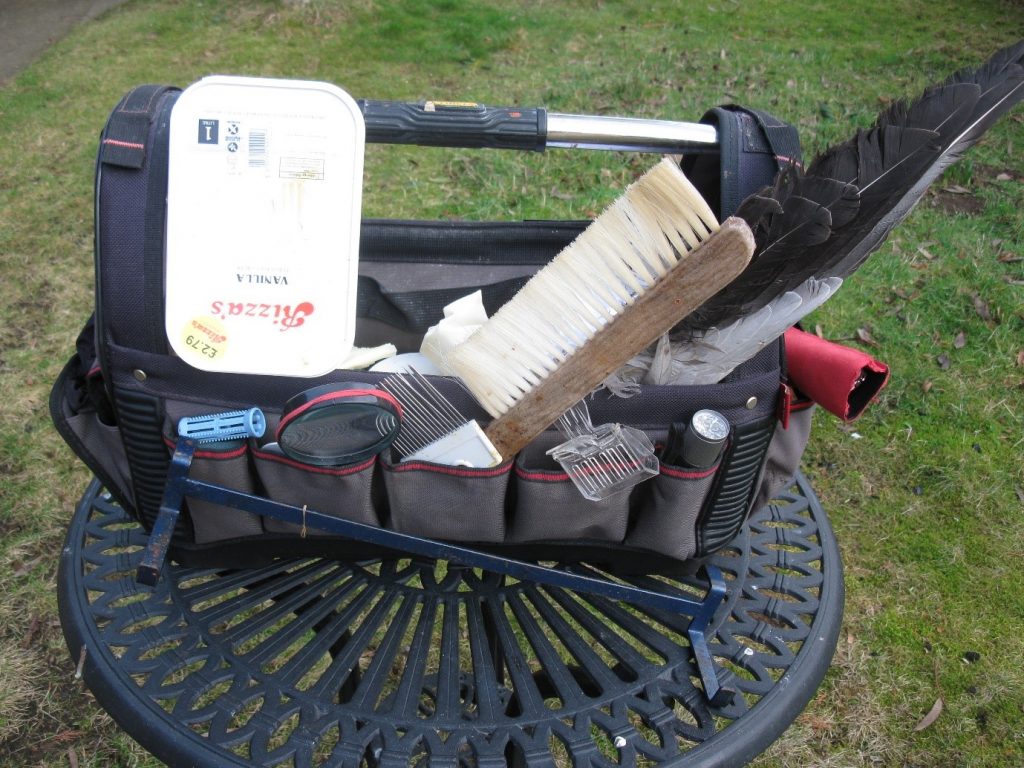
Now you’re almost ready to go but you’ll need something to carry all your bits and pieces round your apiary in. Once you open a hive for inspection it’s no good if you have to keep running back to your shed for forgotten things like I used to do.
Here’s what I keep in my tool box:
- Spare nitrile gloves.
- A tin of baby powder if my hands get hot and clammy inside nitrile gloves.
- Hive tools. I use a J-tool to remove the first frame and a curved- ended tool for the others.
- Bee brush and goose feather to gently brush bees off a frame if shaking a doesn’t remove them all when harvesting honey etc.
- Blue metal hanger (at front) to hang a frame on hive during an inspection when I need space but don’t want to place frame on the floor which is a source of infection for a potential food product like a honey frame.
- Hair curler/queen cage if I want to introduce a queen to a colony and allow the colony to get used to her before she is freed to walk over the combs. Otherwise, bees normally kill a strange queen. They will feed her through the holes.
- Magnifying glass, spare spectacles and torch if I’m not finding it easy to spot eggs in poor light.
- Drone- removal fork for uncapping and inspecting drone larvae for varroa.
- Tin with sharp forceps and match sticks for removing suspicious brood and inspecting for disease (American foulbrood, AFB).
- Clear plastic queen catcher for temporarily holding the queen safely during some procedures but I have never used this.
- Plastic box for storing bits of comb and propolis that are scraped off frames (important not to leave debris round the apiary as it increases infection risk, and may promote robbing of hive by bees from another hive).
- Spare smoker fuel.
- Queen marking kit consisting of coloured (white, yellow, red, green and blue) non-toxic Posca pens. Each year a different colour is used to mark the queen’s thorax as a reminder of the year she emerged. Year ending 0 or 5 is Blue; 1 or 6 is white; 2 or 7 is yellow; 3 or 8 is red and 4 or 9 is green. 2023 is a red year which I remember by the mnemonic, “Will you rear good bees?”
- Pen & paper for notes.
- Antihistamines because I tend to swell up after bee stings.
Keeping Notes.
Keeping hive records is really important because it helps you learn more about your bees. You can record the numbers of frames of eggs and brood and compare at each inspection building up a picture that enables you to see how each colony is progressing. You can take early action to remedy any problems with colonies that are not doing well.
If you fill in the details of an inspection immediately you have finished you have more chance of remembering them. It is a legal requirement to document details of any medicines given to bees, and you should record anything that you give to bees including sugar or pollen. Trading standards can ask to see your records if you sell honey/ products for human consumption/cosmetics.
Maintaining a reflective beekeeping journal will also help you learn—especially from your mistakes. I like to go back over my diaries and it makes me smile to see some of the entries from 19 years ago when I started. I’ve learned so much from the bees but the process is ongoing and I would never say I knew it all.
Other Essentials.
After hives (including frames and wax foundation) and bees, the other must-have items are:
- Personal protection (suit/jacket & veil, boots, gloves)
- Smoker
- Hive tools
Smoking.
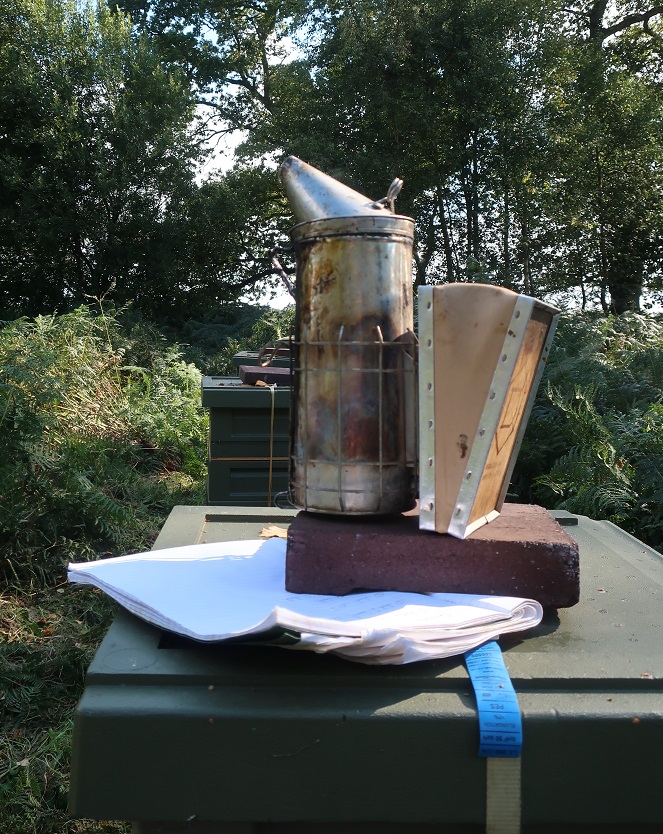

When they sense smoke, honey bees fill up with honey and get as far away from the fire as they can. In the wild they don’t actually fly away to escape because a heavy gravid queen cannot fly and the colony would be doomed without her. The only reason that queens fly in swarms is because they have been prevented from eating for a few days and slim down enough for flight. Scientists in South Africa, where bush fires are common, have observed cave nesting bees reacting to fire and moving to the back of cave or crevice to avoid the heat.
With full abdomens, it is harder for bees to bend and sting the beekeeper. Smoke also masks alarm pheromones which signal distress and alerts other bees to come and defend the colony—and sting you.
The History of Smoke.
American commercial beekeeper, Moses Quinby, is credited with inventing the smoker in 1875 making it easier to inspect colonies–especially defensive grumpy ones. Previously, beekeepers waved smouldering rags, or tobacco pipes, over the hive, but now we can direct the smoke more accurately and control the amount that the colony has to endure. Some colonies don’t require much smoke at all but it’s wise to have a well-lit smoker to hand always in case the colony mood suddenly changes, or you have to move bees down below the frames to avoid crushing them when you move the frames together and close up the hive.
How to Smoke a Colony.
Smoking heavily at the entrance tends to results in large numbers of bees flying upwards to eyeball you warily as you open the hive, so a small warning puff of smoke is all that is needed, if at all. Using smoke sparingly from above is a technique more commonly practised today and serves to move bees away from the frame lugs (handles) and prevents them being crushed.
I think that using a lot of smoke is disturbing for bees and disrupts communications via pheromones, so many people don’t use smoke at all but rely on a light water spray. There are some situations that necessitate using a lot of smoke. Handling a very defensive colony almost certainly results in multiple stings if you are not careful, and this is when I use smoke liberally. However, you must always give bees time (approx. 5mins) to take in the honey before you open the hive. Someone performing a shook swarm that relies on shaking bees onto new empty frames of foundation might smoke the colony heavily and leave them a few minutes before transferring them to the new brood box. They will take stores into their honey crops which helps draw out the new foundation. However, this procedure is stressful enough and you will be feeding a sugar syrup solution to promote wax making so smoking heavily is not essential.
The smoke mustn’t be hot so it’s good to test it first on your own forearm—not so easy if you are rigged up in heavy duty gauntlets. When you burn bees, they make a distressed sound like a carbonated drink fizzing up and it is totally irresponsible to harm bees this way.
You need to be able to keep your smoker going for the time you are working the hives so keep refilling frequently and working the bellows to keep it going.
Fuel.
There are many different types of suitable fuel but the key is never to burn plastic or other toxic fuels. If using hessian sacking ensure that there are no manmade fibres included. There is a knack to lighting your smoker and keeping it alight, and it is best learned with help from your mentor. I would avoid cardboard as the main fuel because it tends to produce very hot smoke. Adding fresh green grass to a smoker cools it down but it’s best to choose your dry fuel carefully.
I struggled keeping my first smoker alight till I discovered that the hole in the bellows was not in alignment with the tube in the firebox so no oxygen was getting in when I squeezed the bellows. If you are going to have several colonies then buy the biggest smoker that you can afford. Having said that, I’m very happy with the one that I’ve had since I started and it’s been mended and soldered together several times. My favourite fuel is whisky bung cloths that are squares of hessian wrapped around wooden rounds used in the local distilleries to plug whisky barrels. They smell delicious. I also like the smell of dried thyme pruned off plants at the end of the season.
Suitable fuel:
- Hessian sacking.
- Wood pellet cat litter (fresh) but why buy when you can collect free fuel.
- Pine needles.
- Grass cuttings (produces a cool smoke).
- Dried rotten wood (can be hard to light so can be added later).
- Dried lavender/thyme stalks.
- Sisal rope/binder twine.
- Old cotton rags.
- Green grass to keep smoke cool.
You might have some good ideas yourself for smoker fuel. On a final note, smokers left unattended have caused fires and more than one beekeeper has set alight the back of their car. Take care when lighting a smoker not to have your veil on, or be wearing rubber/nitrile gloves as it can easily go badly wrong and you end up with nasty burns. Carry water to put out the fire when you empty your smoker, and carry a hot smoker in a metal case in your car.
Welcome.
Welcome to all the new beelistener subscribers who joined for weekly blogs, and to everyone who generously donated to the cost of site maintenance and security. Thank you.
Thank you, Ann, for sharing detailed information about your toolkit. It has inspired me to upgrade mine this winter.
Hello, Tom. I’m glad the toolkit story inspired you to upgrade yours. Best wishes for successful overwintering of your colonies, Ann.