Introduction.
When I started beekeeping I didn’t have a mentor and when I first opened one of the UK equipment catalogues to choose frames I was completely bamboozled. I’ve never really got along with numbers anyway. Nowadays it’s a recognised condition with a label, but that’s of little help when confronted by a list of seemingly meaningless measurements, DN this, or SN that, so I called up the company for help and was advised on exactly what I needed to order. I still didn’t know why there were so many frames to choose from and I’ve always wondered how other people managed to navigate the catalogues. It was good to find an article by Sue Remenyi tackling this very issue in a recent edition of BBKANews. Sue has kindly agreed to write a guest blog version of this for us. All guest blog photographs are by Sue Remenyi. Thank you very much, Sue.
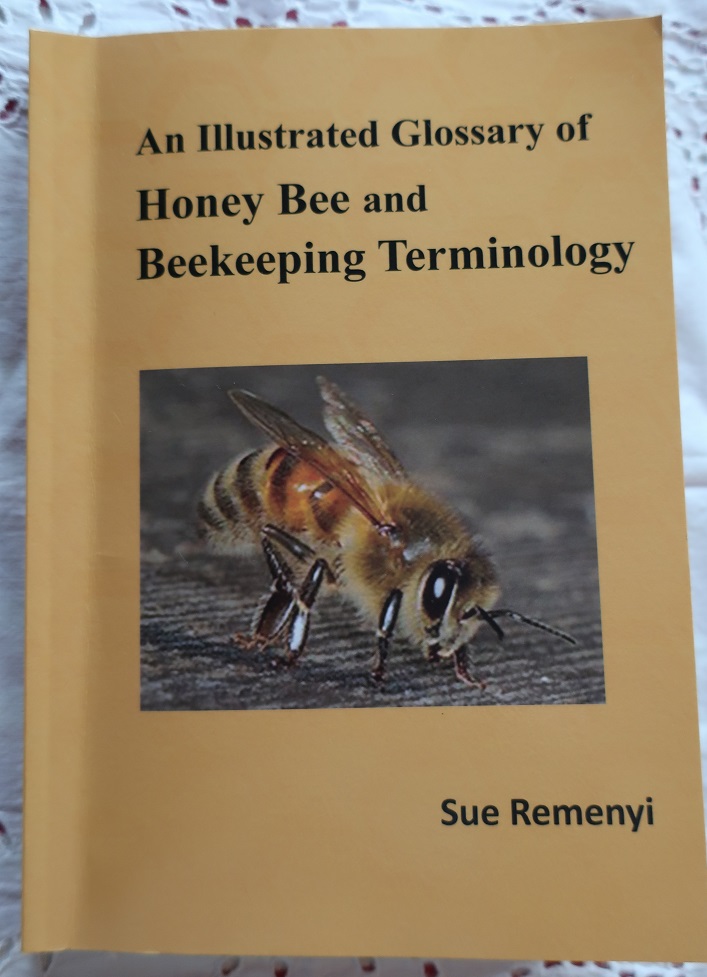
Regular readers will remember this gem of a book. https://www.beelistener.co.uk/book-review/sue-remenyis-book-review-and-drone-mating-behaviour-part-3/. Sue untangles the terminology of beekeeping offering another must- have publication for beekeepers.
Frames.
As a beginner beekeeper, one of the most confusing things to choose is the right frames for your hive. There are so many different options available, and it can be hard to know which ones are right for you.
In this blog post, I’ll discuss the different types of frames available for British Standard (BS) National hives, and I’ll offer some suggestions on how to choose the right ones for you.
Although there are exceptions, frames usually have a top bar, two side bars, and two bottom bars. Beekeeping equipment suppliers offer a range of frame types to fit National hives, including deep and shallow brood frames, as well as frames for supers. These are often identified by a prefix followed by a number, such as DN for Deep National brood frames and SN for Shallow National super frames.
Looking at the frames section in the Thornes catalogue there are 10 different types of frames available for the BS National hive alone. When you consider that on the face of it, two types of frames are needed in most hives – something to fit the brood box and something a little shorter to fit the supers, it is not surprising that the choice can be somewhat bewildering.
The Options.
So, let’s look at what the options really are and what might influence the beekeepers’ choice of frame. Table 1 shows the dimensions of the common brood (deep) frame options for the BS National hive.
Brood Frames
| Frame name | Top bar (width x length) | Side bars (width x length) | Bottom bar length |
| DN1 | 7/8” (22mm) x 17” (432mm) | 7/8” (22mm) x 81/2” (216mm) Straight | 14” (356mm) |
| DN2 | 11/16” (27mm) x 17” (432mm) | 7/8” (22mm) x 81/2” (216mm) Straight | 14” (356mm) |
| DN4 | 7/8” (22mm) x 17” (432mm) | 13/8” (35mm) tapering to 7/8” (22mm) x 81/2” (216mm) | 14” (356mm) |
| DN5 | 11/16” (27mm) x 17” (432mm) | 13/8” (35mm) tapering to 7/8” (22mm) x 81/2” (216mm) | 14” (356mm) |
| 14” x 12” | 11/16” (27mm) x 17” (432mm) | 13/8” (35mm) tapering to 7/8” (22mm) x 12” (305mm) | 14” (356mm) |
To some extent the choice of frame depends on the beekeeper’s preference, and of course, like all things beekeeping, there are pros and cons to consider. One option is to use Hoffman-style frames with tapered side bars that are self-spacing, which makes it easier to position the frames in the hive box. When the frames are in the hive the tapered sides touch each other so that the correct amount of bee space is provided between the frames and 12 frames will fit snuggly (maybe too snuggly) into the brood box. I am inclined to have 11 frames in the box with a dummy board to allow for easier manipulation (see Figure 1).
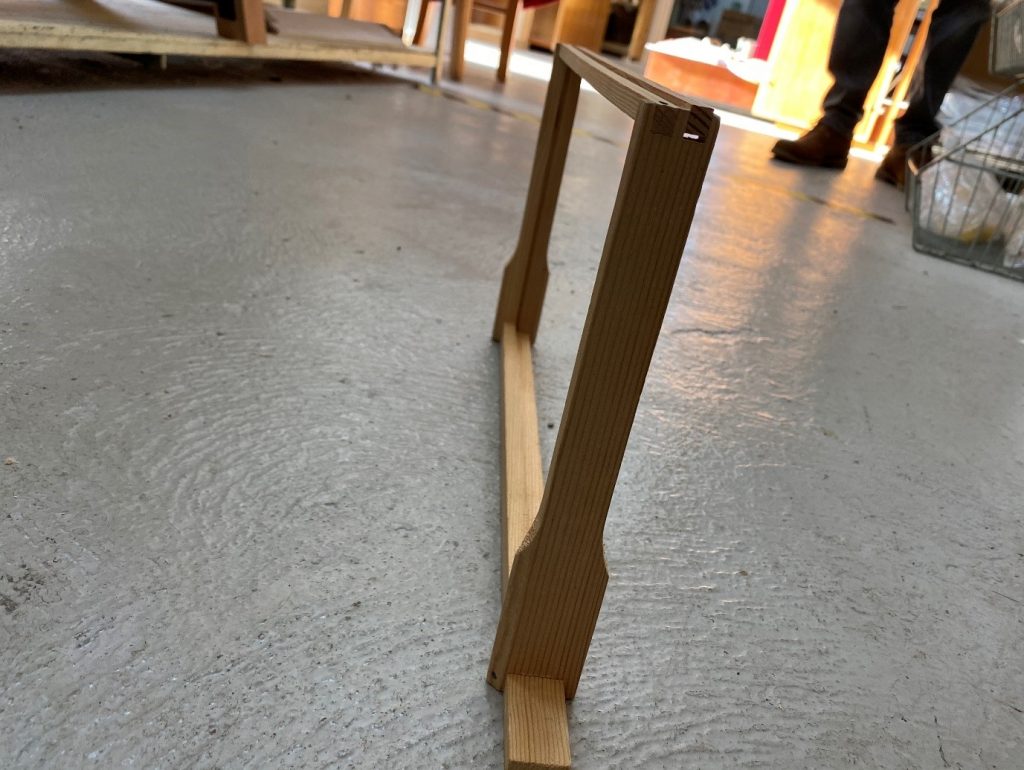
Figure 1: A Hoffman style frame
In contrast, straight-sided frames require the correct spacing between frames to be provided, which can be achieved by using plastic or metal ends on the top bar or by fixing a metal structure to the side of the hive box, known as a castellated spacer – see Figures 2 and 3 respectively. Note that Manley frames (see below Figure 4) are an exception.
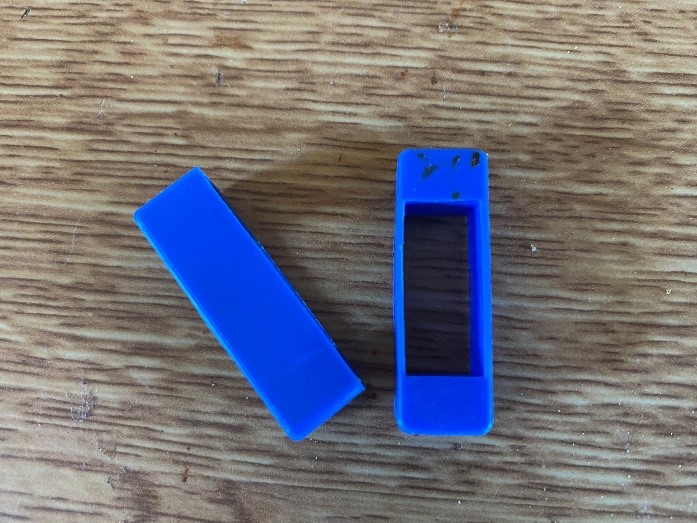
Figure 2: Narrow spacer
Figure 3: 9 slot Castellated spacer
As can be seen from the table, there are also different widths of top bars available, with a suggestion that wider bars add strength to the frame. In reality however the width makes no difference to the structural integrity – I have never heard of a top bar snapping under pressure – and I have it on good authority that commercial beekeepers generally opt for the narrower top bar which, consisting of less wood, are cheaper than the wider counterpart.
A note on spacers
It is worth noting that plastic or metal ends come in two widths, narrow and wide, which allows for different spacing between the frames. The narrow spacer is versatile and can be used for both brood and honey super frames, while the wide spacer is intended for honey supers only. It is helpful to initially use narrow spacers on undrawn super frames, and then switch to wide spacers once the comb has been drawn so as to reduce the number of frames needed per super and to improve the honey-to-wood/wax ratio. If wide spacers are placed on super frames before the comb is drawn the space left between the sheets of comb encourages bees to build brace comb.
Castellation spacers are recommended for use in honey supers, and they come in three sizes for the BS National – 9, 10 or 11 slots. Although some beekeepers do use castellated spacers with brood frames, this can impede frame manipulation in the brood box.
Super Frames
In the case of a BS National hive, whether a standard or the larger 14 x12 brood box is being used, the super boxes are usually the same size. The choice of frames is similar to those of the brood box in that the width of the top bar can vary and the sides can be Hoffman or straight. Table 2 shows the dimensions of the common super (shallow) frames for the BS National hive.
| Frame name | Top bar (width x length) | Side bars (width x length) | Bottom bar length |
| SN1 | 7/8” (22mm) x 17” (432mm) | 7/8” (22mm) x 51/2” (140mm) Straight | 14” (356mm) |
| SN2 | 11/16” (27mm) x 17” (432mm) | 7/8” (22mm) x 51/2” (140mm) Straight | 14” (356mm) |
| SN4 | 7/8” (22mm) x 17” (432mm) | 13/8” (35mm) tapering to 7/8” (22mm) x 51/2” (216mm) | 14” (356mm) |
| SN5 | 11/16” (27mm) x 17” (432mm) | 13/8” (35mm) tapering to 7/8” (22mm) x 51/2” (216mm) | 14” (356mm) |
| Manley | 11/16” (27mm) x 17” (432mm) | 15/8” (41mm) x 512” (216mm) | 14” (356mm) |
In the case of honey supers, it is useful to have more space between the frames so as to allow the bees to draw out more comb in which to place honey. As mentioned above, this can be achieved by using SN1 or SN2 frames and changing the spacers depending on whether comb is undrawn or drawn.
An alternative approach to self-spacing frames in a honey super is to use the Manley frame which has a wider top and bottom bar as well as wide straight sides. An advantage of this option is that uncapping during the extraction process is helped by the straight sides (See figure 4).
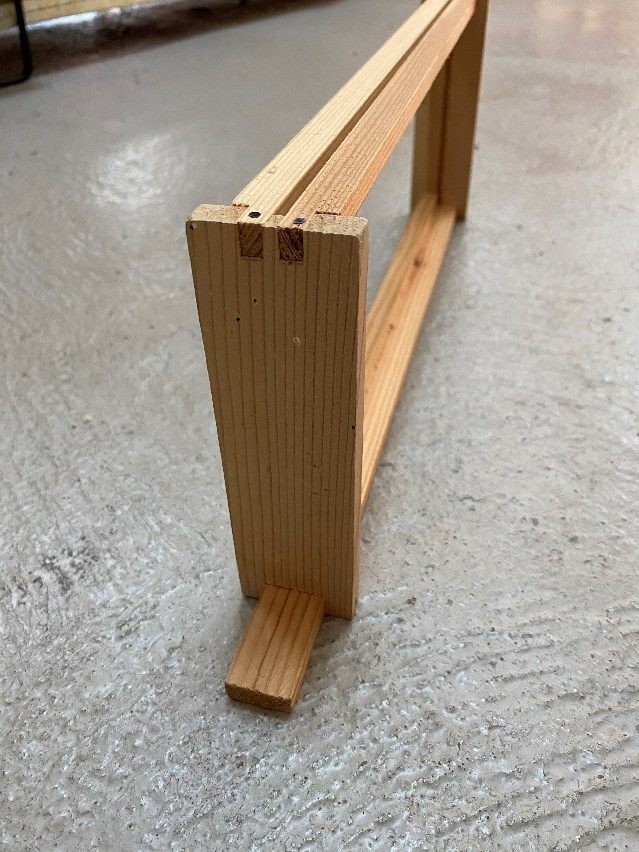
Figure 4: A Manley Frame
Pros and Cons of different configurations
So, having looked at choices available, how do you decide which option is right for you? Well, you could ask fellow beekeepers, but we know you won’t get a unanimous answer! Let’s consider the pros and cons of the main options.
Self-Spacing frames
Using frames that don’t require additional enhancements is a logical choice, and the Hoffman self-spacing frame is a prime example. However, due to their design, these frames have more wood, which means a larger area of the frame touches the next frame. This gives the bees greater opportunities to propolise around the joints, making it difficult to lift the frames. Therefore, I recommend limiting the number of frames to 11 in a brood box and using a dummy board to prevent bees from rolling when removing the first frame.
Using Spacer Clips
The benefit of using clips on the ends of frames is that you can change their width according to your needs. However, despite the clips being the only parts of the frame that touch the hive and each other, bees still like to propolise around them, making it tricky to remove the frames.
Using Castellated Spacers
Castellated spacers minimize the opportunity for propolis buildup, making it easier to remove frames from the spacers without disturbing the bees. However, using these spacers in a brood box can make it tricky to manipulate different parts of the colony, as the frames cannot slide back and forth.
Using Manley frames in Supers
The main advantage of Manley frames is that due to the wide top and bottom bars they are able hold more honey because the bees are able to draw the comb out to the thickness of the parallel side bars. Although National supers will hold 10 Manley frames this is a tight fit and puts some beekeepers off using them. Having straight sides is said by some to be easier to uncap during the extraction process, but in my experience Hoffmans prove no problem. To ease the issue of the tight fit, using a combination of Hoffman and Manleys is an option and the bees do not seem to mind.
A beginners guide: Which frames to use and when?
If you are a beginner and have a mentor, it is probably best to avoid conflict and go with what they suggest, at least until you have had real experience of handling the frames which may lead you to decide a different approach. Otherwise, consider starting out using 11 Hoffman frames in both brood and supers with a dummy board.
In year two the frames you used in the honey supers will be drawn and you could then aim to increase the honey yield by migrating these 11 frames onto 10 frame castellations at the beginning of the honey flow. This will allow the bees to draw the cells out further, providing more space for honey storage.
Hopefully, you will have had the opportunity during this time to handle and manipulate other beekeeper’s frames which may lead you to try alternatives – for example to change the Hoffman frames in the honey supers to Manleys. Over time my own personal preference now is 10 Hoffman plus a dummy board in the brood box and 9 Manleys plus one Hoffman in my supers.
If you enjoyed reading this, you can subscribe to receive future posts by email. Also, if this article helped you with your work, please consider making a small donation to keep our site running. You can do this through the “Donate with Paypal” button that appears at the side of the screen if you are using a desktop, or by scrolling towards the bottom of the page if you are using a mobile.
Thank you, Ann 🐝
This is a really useful article. I have one quibble which will seem pedantic, though I don’t think it is. The term ‘super’ does not tell you anything about the size of a box. Rather it describes where it is placed. Supers can be, and often are, the same size as brood boxes. The quick way to describe different box sizes is, of course, shallow and deep. Medium and jumbo are sometimes used too.
Hello Archie, Thank you for drawing attention to this detail.I agree with you. If you look back at the article you will see in brackets the words “shallow” and “deep” after super and brood boxes. Perhaps we should all start using these terms and stop using “super”, especially when teaching new beekeepers. The Nosema spp. were re classified 2 years ago and are now Vairimorpha spp. but everyone still refers to Nosema, so changing to the correct term is going to take a long time at this rate unless we talk about it now.